Tenmiro Strip Lights Troubleshooting: + Full Set up Guide
Do you have issues installing or setting up your Tenmiro Led Lights? This article has got you covered, continue reading to find out how to set up and fix common issues with your strip lights.
In this article, we’ll dive into some common issues that may arise with Tenmiro LED strip lights and provide some useful tips to help you set up and troubleshoot any issues you may be having with your Led Lights.
How to Install Tenmiro Led Strip Lights
Here’s how to set up your Tenmiro Led Strip Lights, ensure to follow the steps below carefully:
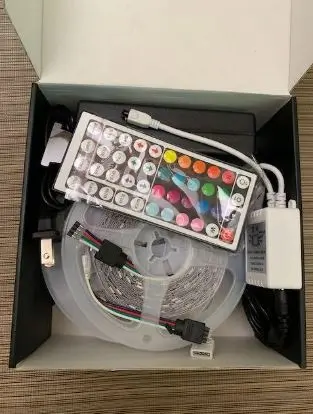
Step 1: To install the strip lights, start by opening the package to check if everything specified on the package is complete and intact.
Step 2: Then, power the strip light to test whether it could light normally.
Step 3: Next, clean the surface of the object where the strip needs to be installed and keep it dry. Any dust and liquid will affect the stickiness of the adhesive.
Step 4: After cleaning the surface, tear off the adhesive tape and paste the strip in the correct place at once time. Press the strip firmly from the beginning to the end to remove the air from the strip and the surface of the object.
Step 5: Once the installation is complete, connect the power adapter to a power source and turn on the Led Strip Light.
Step 6: Search for “Keepsmile” and install the application from the Google play and Apple store or via the QR code on the manual/controller.
Step 7: Confirm the Led Light has power and is turned on, then turn on Bluetooth on your smartphone.
Step 8: Tap the “+” icon at the top right corner of the page and select “Light Strips, then the app will automatically search and connect to the Led Strip Light.
Once the setup is complete, you can control the Led Strip Light with the remote control or the Keepsmile app. You can also sync with the music playing, set schedules and dim the light.
Tenmiro Led Strip Lights Instructions
Here are the Tenmiro Led Strip Lights installation Instructions:
Step 1: To install the strip light, begin by opening the package and laying the strip straight. Ensure that the strip light’s appearance and all parts are in good condition before proceeding.
Step 2: Test whether the strip light could light normally by powering it.
Step 3: Next, clean the surface of the object where the strip light needs to be installed and keep it dry. Any dust or liquid on the surface will affect the stickiness of the adhesive. The surface where the light adheres must be smooth and clean; otherwise, the strip lights may fall off.
Step 4: Peel off the adhesive tape and paste the strip in the correct place in one go. Press the strip firmly from the beginning to the end to remove the air from the strip and the surface of the object.
Step 5: Considering the weight of the strip light itself and other influences, you may place a clip on each section of the strip light to reinforce it. If there is a corner, place the clips on each side of the right angle.
Step 6: Once the installation is complete, connect the power to the strip light
Step 7: You can switch the light on/off and choose the color effect using the control box or remote control.
How to Factory Reset Tenmiro Strip Lights
Do the following steps to restore your Tenmiro Led Strip Lights to their factory default settings:
Step 1: Turn off the LED strip lights using the remote control or by disconnecting the power supply.
Step 2: Wait for about 30-60 seconds then plug the Strip Light into power and turn it on
Step 3: Turn the light off/on until the Led Strip Lights start flashing then stop and set up your lights all over again.
Note: Resetting your Led Strip Lights will remove all settings so you’ll have to set up the light all over again after a successful reset.
Tenmiro Strip Lights Remote Not Working
If your Tenmiro LED strip lights remote is not working, here are some tips you can try to troubleshoot the issue:
- Make sure the batteries in the remote are fresh and inserted correctly. Sometimes a weak or incorrectly inserted battery can cause the remote to malfunction or not to work completely. If the batteries are dead, replace them to see if this fixes the issue.
- Check the remote control sensor on the LED strip lights. Make sure it is clean and not blocked by any obstacles. Sometimes dust or other debris can prevent the remote from communicating with the LED strip lights.
- Check the connection between the LED strip lights and the power supply. If the lights are not connected properly, the remote may not work. Make sure the connection is secure and the power supply is plugged in correctly.
- Try resetting the remote by removing the battery for a few seconds and then reinserting it. This may help to reset any programming issues that are causing the remote to malfunction. Alternatively, press the power button to turn off the light, then turn it back on while pressing Fade 7 to reprogram the remote.
If none of these steps work, contact Tenmiro customer support for further assistance.
How Do You Turn On Tenmiro Strip Lights?
To turn on Tenmiro LED lights, connect the LED strip lights to the power supply provided in the package. Make sure the power supply is connected to a power source.
Find the control box attached to the LED strip lights the press the power button on the control box to turn on the LED lights. The power button is usually located in the bottom right corner of the control box.
Alternatively, press any of the color buttons on the remote control to turn on the Led Lights. Ensure that the Led Light is receiving a power supply.
How to Cut Tenmiro Strip Lights
You can cut Tenmiro LED strip lights to a desired length to fit your specific project or space. Here are the steps to cut Tenmiro LED strip lights:
Step 1: Measure the length of the LED strip lights that you need and the area and length you wish to install the light. Make sure to measure carefully to avoid wasting any of the lights.
Step 2: Look for the cut marks on the LED strip lights. Tenmiro LED strip lights have designated cut marks on the light strip to show where you can safely cut the strip.
Step 3: Using a pair of sharp scissors, cut along the designated cut marks to remove the excess length of the LED strip lights.
Step 4: To reconnect the LED strip lights, you can use the Tenmiro connectors provided in the package. Make sure to match the positive (+) and negative (-) terminals correctly when reconnecting the wires.
Step 5: If you don’t have the Tenmiro connectors that came with the pack, you can use solder wires to reconnect them. However, be careful when soldering to avoid damaging the LED strip lights. Also, Gapless Solderless Connectors make the lights look more aesthetic.
Note: Remember to test the LED strip lights after cutting and reconnecting to ensure that they still work properly
Final Words
There you have it, the steps and instructions for installing your Tenmiro LED Strip Light, as well as some tips for troubleshooting common problems you may encounter while using it.
Be sure to avoid getting water on the LED light, and only cut the strip light on the designated cut mark to prevent damage.
If you’re still having trouble with installation, setup, or fixing an issue with your Strip Light, contact Tenmiro customer support for further assistance or consider replacing the LED Strip Light.