Gupup Led Light Strip Troubleshooting: + Full Set up Guide
If you’re here, there are chances that you’re having issues with your Gupup Led Light Strip. Whether you are struggling with installation, or connectivity problems this article has got you covered.
This article will provide you with Gupup led light strip troubleshooting tips to get your Led light strips up and running smoothly. Be it an installation or connectivity problem, rest assured that by the end of this article, you’d have fixed the problem.
Without further ado, let’s begin fixing those installation and connectivity issues with your Gupup Led Light Strip!
How to Install Gupup Led Light Strip
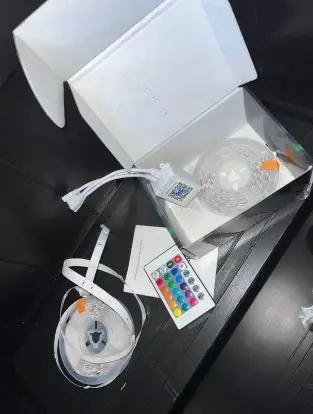
Follow the steps below to unbox and install your Gupup Led Light Strip:
To ensure a smooth installation process, preparing all the necessary accessories beforehand is important. This will help you avoid any unnecessary delays or interruptions during the installation.
Step 1: Start by peeling off the adhesive strip from the backside of the LED strip.
Step 2: Next, stick the LED strip lights on an even surface or the desired space you wish to light up.
Step 3: After that, connect the pins of the LED strip lights to the socket of the control box, making sure that both arrows are pointing at each other. It is important to pay attention to the polarity and direction of the pins of the LED strip lights and the socket of the control box because if they are not connected correctly, the LED lights will not light up.
Note: You should connect the LED strip pins socket and the LED strip pins where both arrows are pointing at each other.
Step 4: Once the LED strip lights are properly connected to the control box, the next step is to ensure the infrared (IR) receiver’s sensor is placed in a visible range and less than 5 meters from the remote control. Make sure the round face of the IR sensor is facing the remote control without any obstacles.
Step 5: Then, connect the DC plug of the USB cable to the DC socket of the control box.
Step 6: Finally, connect the USB 2.0 plug of the USB cable to the USB socket of your TV or USB outlet of the AC adapter.
Step 7: Turn on the LED strip light and use the remote to control the light and change the colors to your choice.
With all these steps done correctly, you should now be able to enjoy your Gupup LED strip lights. You can also connect the light to Bluetooth, to do this, try the setup steps below.
How to Connect Gupup Led Light Strip to Bluetooth
To set up your Gupup LED Light Strip via Bluetooth, try the following setup steps to complete pairing your light strip via Bluetooth:
Step 1: Download the ‘Apollo Lighting’ app: The first step is to download the Apollo lighting app from your phone’s app store. The app is available for both Android and iOS devices.
Step 2: Unbox your Gupup Led Light Strip and install it. Refer to the steps above to install the light and turn it ON.
Step 3: Enable Bluetooth on your mobile phone. You can do this by going to your phone’s settings and turning on Bluetooth.
Step 4: Open the Apollo app, and press the On/Off button, the app will auto to connect the LED lights.
Step 5: Once the app finds your LED light strip, select it from the list of available devices.
Step 6: Follow the on-screen instructions to complete the setup and control your Gupup LED Light Strip with the Apollo Lighting app via Bluetooth.
You can use the app to control the lights by changing the colors, and brightness, and even setting up different lighting scenes.
How to Fix Gupup Led Light Strip Not Connecting to Bluetooth
if you are having trouble connecting your Gupup LED Light Strip to Bluetooth, here are some steps you can take to fix the problem::
- Make sure your phone’s Bluetooth is on. Before trying to set up your Gupup led light strip to Bluetooth, make sure that your phone’s Bluetooth is turned on. you can check this by going to your phone’s settings and verifying that Bluetooth is enabled.
- Ensure that your Gupup led light strip is turned on and properly plugged in. if the Gupup Led Light Strip is not able to connect via Bluetooth, check the app permissions. make sure that the app has permission to access your phone’s Bluetooth.
- Power cycle the led light strip. to do this, unplug it from the power source and wait for 30 seconds or more, then plug it back in and try to connect it to Bluetooth again.
- If the led light strip is still not connecting to Bluetooth, try moving your phone closer to the light. If you’re too far from the light and the signal strength is too weak, moving the led light strip or phone closer can help.
If you’re still having issues with connecting your Gupup LED Light Strip to Bluetooth, reach out to the Gupup support team for further assistance.
Gupup Led Lights Strip Instructions
Here are the Gupup Led Lights Strip Instructions. Follow the instructions to setup or install your Light Strip:
Step 1: Prepare all the required accessories before you begin the installation.
Step 2: Peel off the adhesive strip from the backside of the LED STRIP
Step 3: Stick the LED STRIP LIGHTS on an even surface or your desired space or spot wherever you want to use the Light Strip.
Step 4: Connect the pins of LED STRIP LIGHTS to the socket of the control box ( both arrows pointing at each other). Beware of the polarity and direction of the pins of LED STRIP LIGHTS and the socket of the control box. LED would not light up if they are not connected with the correct polarity and direction.
Note: Connect the LED strip pins socket and the LED strip pins, where both arrows are pointing at each other.
Step 5: The sensor of the Infrared (IR) receiver must be placed at the visible range and should be less than 5M from the remote control. The round face of the IR sensor should be faced with the remote control without obstacles.
Step 6: Connect the DC plug of the USB cable to the DC socket of the Control Box.
Connect the USB 2.0 Plug of the USB cable into the USB socket of your TV or USB outlet of the AC adapter.
Gupup Led Lights Not Working
If your Gupup LED Light is not working, try the following troubleshooting tips to fix the problem:
- Check the power source and ensure that the Led Light has power and is turned ON. In case you have multiple power supplies, attempt using a different one with the same strip to check if it resolves the issue. If the LED strip starts working, it implies that the previous power supply was defective and requires replacement with a new one.
- Check and ensure that you’ve not accidentally cut the wires of the Led Light Strip. If you find any loose or damaged wires then you’ll need to replace or repair them if not, your Gupup Led Light will not work.
- When the pin connection of your LED lights is bad, the Led Light won’t work. This can be resolved by replacing the defective pin connection with a new one. To confirm if a faulty pin connection is the root cause of the problem, you can disconnect the pin and inspect it for any visible damage such as bending or partial disconnection.
If you’re still having problems, contact the Gupup support team for further assistance.
Gupup Led Lights Strip App
The Apollo Lighting app is a mobile application that allows users to control the Gupup LED light strips using smartphones. This app can be downloaded from the App Store or Google Play Store and is compatible with both Android and iOS devices.
The Apollo Lighting app offers a range of features, such as the ability to change the color and brightness of the lights, set up schedules and timers, and control multiple LED strips at once.
Additionally, the app also has a music mode that enables the LED lights to sync with the beat of the music being played on the phone.
To use the Apollo Lighting app, follow the setup steps above to connect your Led Light to the app via Bluetooth.
Can You Cut Gupup Led Lights?
Yes! Gupup LED lights can be cut to a desired length. However, it is important to note that cutting the LED strip at the wrong point may result in permanent damage or cause the lights to not work properly.
The cutting points for the LED strips are usually marked on the strip itself, and it is recommended to only cut the strip at these points to ensure proper functioning.
Additionally, it is important to use the correct tools and follow the manufacturer’s instructions carefully when cutting the LED strip.
How to Cut Gupup Led Light Strip
If you need to cut your Gupup LED light strip to a specific length, you can do so easily with the following steps:
Step 1: Use a measuring tape to determine the exact length you need for your LED light strip. Basically, determine the length you want to cut.
Step 2: Look for the designated cut marks on the LED strip. These are usually indicated by scissors or dotted lines on the LED Light.
Step 3: Using sharp scissors or a sharp blade, cut along the designated cut marks on the strip. Be sure to cut straight and at a right angle to ensure a clean cut.
Step 4: Use connectors to connect both ends of the strip you’ve cut. The connectors are not Included in the package, so you’ll need to buy 4-pin connectors for re-connection.
Step 5: Once you have cut and connected the strip together, test the LED strip to make sure it is working properly before installing it.
Note: Ensure to cut only within the designated marks to avoid damaging the strip or causing any safety hazards. Also, test the strip before installation after cutting.
How to Install Gupup Led Light Strip on TV
Installing Gupup LED light strips on your TV is an easy way to enhance your viewing experience. Here are the steps to install Gupup LED light strips on your TV:
Step 1: Cut the LED strip according to the length of your TV or the design and pattern that you want using scissors or a knife.
Step 2: Make sure the back of your TV is clean and dry before installing the LED strip. Wipe it down with a clean, dry cloth to remove any dust.
Step 3: Remove the adhesive backing from the LED strip and carefully attach it to the back of your TV. Make sure the strip is straight and evenly aligned with the edges of your TV.
Step 4: Plug the USB end of the LED strip into the USB port on your TV. This will power the LED strip.
Step 5: Turn on your TV and the LED strip should light up.
Use the Apollo Lighting app or the remote control to control the lights and customize the colors and patterns.
How Do I Reset My Gupup Led Lights?
To reset your Gupup LED Lights, press the “mode” key of the controller for 5-10 seconds until the Led Light starts to blink rapidly or slowly.
If the Led Light doesn’t blink, release the button then wait for a few seconds before pressing the controller button again for 5-10 seconds and the Led Lights should start blinking rapidly or slowly showing the reset is successful.
In conclusion, troubleshooting your Gupup LED light strip can be a frustrating experience but by following these troubleshooting guides, you can quickly fix the issue.
Always start by checking the connection, power supply, and controller. If the problem persists, try resetting the strip and updating the app. Remember to handle the LED strip carefully, avoid cutting it in the wrong place, and ensure that it is installed properly.